How To Add Printer To MAC?
It is important to acknowledge that any Mac user can print the documents from printers, the only and sole condition is to have a printer that delivers a quality service or output. You can easily learn to install a printer on Max and how to print with the set of instructions for a particular model. Here in this article, you will learn the basic steps how to add printer to mac without interruptions. So, let’s get started!
Prerequisites before adding the printer to Mac
- Make sure your Mac and any other devices are connected with a wireless printer, you need to optimize on a regular basis.
- Remember, the MacKeeper can take care of the Mac device for you, just get the app and let it optimize the Mac performance with few clicks on the run.
What are the steps to add a printer to mac?
If you wish to build a wireless connection with the network printer, then you need to follow the steps that are given below:
- Tap on the “Apple” menu icon on the top left corner.
- Tap on the “System Preferences” option.
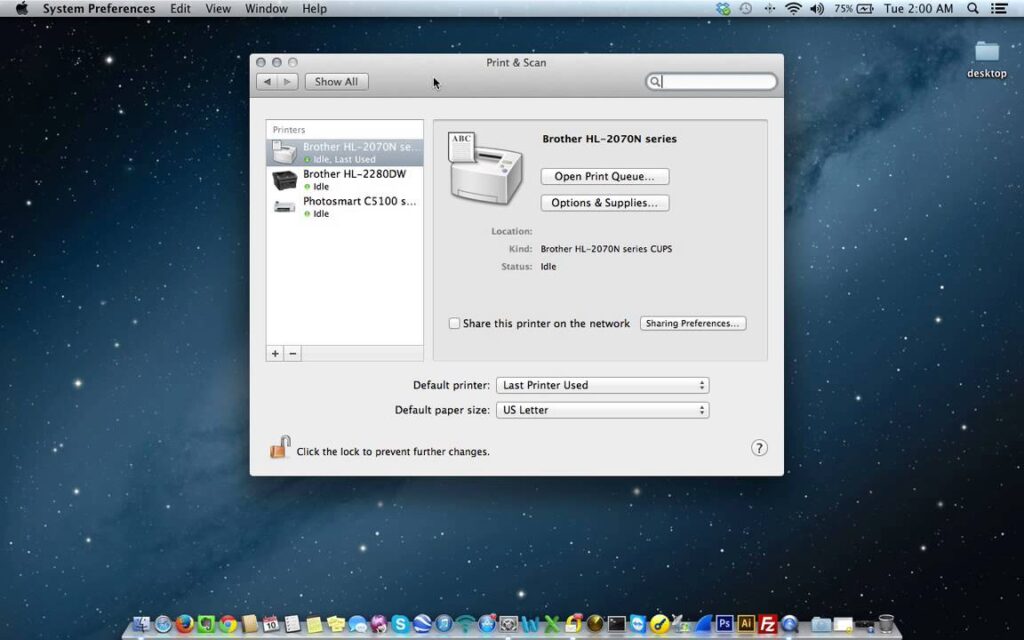
- After this, you have to click on the “Printers and Scanners” option.
- Now, you will see all the connected devices in the sidebar.
Point to remember: Sometimes, for the primary connection, there is a need to attach the printer to the Mac using the USB cable. After which, you can use the setup assistant in order to connect the printer to the wifi network. Furthermore, you will be able to print the print wirelessly or with a wireless printer connection.
How to print from your Mac?
Once you have performed the steps to add a printer to mac and made a connection between the Mac and the wireless printer, here are the steps that you need to follow to print from your Mac device:
- Setup the Wireless printer.
- Find the Printer’s IP address.
- Print wirelessly from Mac.
- Remove the unused printer.
Note: There are most of the network printer models that can be easily connected to the Mac and full setup with AirPrint. One of the advantages here is that there is no need to download the drivers for every printer to make the connection. You can use the wifi and Ethernet connection or An USB cable. You will get the software for Mac automatically installed on your Mac when you connect the Mac to a printer that does not support AirPrint.
How to connect the printer to MacBook with USB?
- First of all, you need to plug in the Printer USB in the Mac laptop or desktop.
- Tap on the “Apple” icon.
- Go to the “System Preferences” option.
- After this, click on the “Printers and scanners” option.
- Now, click on the “+” sign in the list of printers.
- Choose a printer to add.
- Tap on the “Add” option.
In a conclusive viewpoint:
We can now hope that this article is the best solution of this Question “How to add a printer to a mac” and has helped you to print wirelessly by following up the steps to add a printer to a mac. However, we always recommend downloading the Printer Assists driver or getting in touch with the technical support team via the official website. The technical support team is available round the clock to assist you with the best possible solution.
See Also: How to fix the Lexmark Printer Offline issue on Windows 10?
Frequently answered questions
How do I get my mac to recognize my printer?
- Tap on the “Apple” icon on the top of the screen.
- Click on the “System Preferences” option.
- You now have to tap on the “Printers & Scanners” icon.
- Click on the “+” icon to add the Printer.
- New windows will pop-up.
- Just add the printer to your computer and it will appear in the printers list.
How do you add a printer that isn’t showing up?
For this, you need to select the “Start” option and type the “Control Panel” After this, tap on the “Enter” button. In the control panel, select the “View Devices and Printers” option. After this, click on the “Add Printer “option on the window. Select the “Printer that I want isn’t listed” option after the wizard starts.
How do I connect my Mac to my HP printer wirelessly?
- Tap on the “Apple” icon and then tap on the “System Preferences” option. Click on the “Printers & Scanners” option.
- Just tap on the “+” option to add the printer.
- New windows will pop-up on-screen.
- Just add the printer to your computer and it will appear on the printer’s list once it is configured.